Posts

Skulls and Roses Vest

Image
I made a vest using a skulls and roses fabric, paired with a red to match the roses. It's made from a highly modified pattern, so much so that it barely even resembles the Simplicity 1064 pattern which was its base.   

Floral Corset Vest

Image
While I like the corset vest, I realized pretty quickly that corset boning does not pair well with a desk job, so I'll be making other vests and overrobes for the office, and slipping this one back into the depths of my closet. I'm glad I made it, but it won't get quite as much use as I intended for it. 

Lennier Outfit - Overrobe

Image
Maybe in some distant future I'll actually make the belt, but, for now, I quite like wearing the overrobe as its own piece separate from the rest of the outfit. Here is the Lennier Overrobe, I'm very pleased with how it's turned out and how it fits me!  

Corset Vest - Front

Image
Slowly working on the corset vest, I had a bunch of life stuff happen and have been working on the vest gradually in the evenings. I'm almost done attaching the front to the back (it will still need the lining). 

Corset Vest - Vest Front

Image
I sewed together the vest front panels, and now I'm working on top-stitching the seams for both halves. It already looks like a vest, partly because of how distinctive the shape is with just a few pieces connected.

Corset Vest - Fabric Cutting

Image
Yesterday was a fabric cutting morning, I cut the fabric for a corset vest I'm planning to wear to work. The front will be the yellow floral fabric, with a red back and a brown lining. 

Performance Outfit - Shorts Progress

Image
After spending an evening working on the top for the performance outfit and running into a design challenge, I pivoted to the shorts so I could make some progress. They're pretty basic to start, but this pair will end up with a side stripe and maybe a short skirt, as well as detachable garters. 

Lennier Outfit - Over-Robe

Image
The overrobe is almost done! I need to finish the bias tape hem along the front, and add it to the armholes. I won't have enough left over to hem the pants with bias tape, so when I finish the overrobe I'll hem the bottom edge of the pants. I should have the whole outfit finished next week.  

Lennier Outfit - Pants and Over-Robe

Image
I've mostly finished the palazzo pants. Everything except the bottom hem is finished, because I still haven't decided whether to hem both legs or to use bias tape to finish them. Because that decision is very much affected by whether I have enough bias tape after making the over-robe, I've started on that as well. The lining is assembled, for the pattern I'm using a very modified version of McCall's 8423. I'm not using batting, I won't be quilting it, I lengthened it at the lower edge, and I'm connecting the side seams so it's a bit more like a robe (without sleeves) rather than a long vest like the original design. I've previously used this pattern to make a quilted vest , so I have a good sense of which features I do and don't want.  In the vest I made last time, the order of assembly meant that some seams are visible inside, as the outside, lining, and batting were concatenated and then quilted for each panel before the panels were put tog...

Performance Outfit - Fabric Cutting

Image
I cut fabric for a new project! This is a commissioned piece, so I won't be the one wearing it in the end. It's a performance outfit, so it needs to handle a lot of wear and also look good in motion. The client wants a crescent moon cutout in the chest and an asymmetrical neckline, neither of which were part of the original Simplicity 9620 pattern. Also, the shorts will be a lot shorter, probably have a skirt, and eventually there will be detachable garters. But, for now, it's a bunch of glittery fabric (and some less glittery lining material to hold it together).  

Lennier Outfit - Waistband Progress

Image
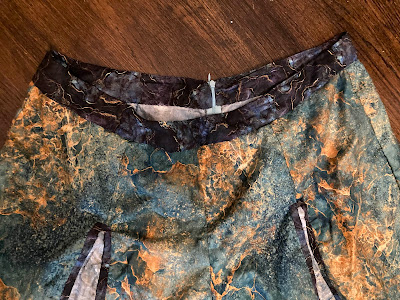
The Minbari Palazzo Pants are starting to look like pants! The waistband is in place but not yet sewn shut, the next step is to slipstitch it closed. After that, the final step is hemming the bottom of each pant leg. Each one has a circumference of several feet, so it'll take a while. I ended up putting bias tape everywhere there's a change between the other fabrics, and it helps it look like different textures coming together rather than just awkward edges between disparate fabrics. Also, the yellow details in the purple I used for the bias tape and waistband tie the yellow/gold from the green/yellow fabric in with the rest of the designs. 

Lennier Outfit - Palazzo Pants - Panels Assembled

Image
The four Minbari Palazzo pants panels are assembled (front right and left, back right and left)! I have bias tape borders around any changes in fabric between other panels. Because of the way the pants will meet the shirt, I decided to have grey in the back and green/orange in the front and along the sides, to best match the shirt without having everything look askew if something doesn't line up perfectly once I'm wearing it. The next steps involve attaching these panels to each other so they start to be pants, then comes the waistband (which will use the purple fabric that comprises the bias tape). Part of what helps the purple bias tape connect the panels without looking out of place is that it has the same yellow/gold color in it which, in larger quantities, forms the bulk of the orange-ish sections in the green/orange fabric.       

Lennier Outfit - Palazzo Pants (more panels)

Image
I finished adding the triangular panels for the two front sections (first image), now I'm working on the bias tape border before inserting the triangular panels for the two back sections (second image). 

Lennier Outfit - Palazzo Pants

Image
Because Minbari aesthetics have a lot of triangles and I am trying to make a Lennier-inspired outfit, not a show-accurate cosplay of the character, I'm making palazzo pants using McCall's pattern 8223, but I'm adding some bias tape borders and detailing that aren't in the original pattern, to better fit the aesthetic. Palazzo pants can look like skirts when the wearer is standing, but clearly are pants when walking. I've made them several times before and I think they'll work very well with the overall aesthetic, and complement the shirt for this outfit.   

Lennier Outfit - Shirt Complete

Image
I finished the first Lennier shirt! I learned some things for the next one, and it turned out really well. In the end, I used four fabrics and parts of two patterns. Simplicity 1544 for the basic button-up shirt, and McCall's 8423 for the collar. The triangular cuffs and central torso triangle are based on Lennier's outfits in the show Babylon 5. I was aiming for a shirt which is clearly based on his clothing, but which I could also wear in an office environment without it looking like a costume. When I eventually make the over robe, pants, and belt, those items will be what makes it harder to wear casually (though I do intend to try). 

Lennier Outfit - Cuffs and Hem

Image
Because I'm trying to capture the general look of a character from a show, there are some significant ways that this shirt departs from the basic long-sleeved button-up shirt pattern I'm using as a base (Simplicity 1544). The shirt cuffs are now mostly complete, they just need the hook-and-eye closures I'll use instead of buttons. I've made a start on the shirt's bottom hem, next is to finish that, finish the open edge of the shirt, and then work on the collar. I've tried the shirt on, and the fit around the shoulders is really nice. I like it enough that I might use this pattern for more shirts after this project is complete.  My goal is to have an opening in the sleeve cuffs which allows the sleeves to be partially opened and then fastened when worn, but which, visually, does not deviate from the shape of the character's sleeves on the show. Thus far, it seems to be working!  

Lennier Outfit - Front Seams

Image
I'm attaching the triangular front panel to the shirt, it involves the bias tape I made recently. It's turning out really well! The purple thread is basting which will be removed when I finish it.  

Lennier Outfit - Bias Tape

Image
It took two days (4-6 hours each day), but I finished making two rolls of double-fold bias tape. Each roll is a little over eight feet (~2.5 meters). The whole process involves two rounds of pinning and ironing, per roll. I'll use the bias tape for edges and accents, one for each outfit. If there's any left over then I'll have something to gradually use for other trims.  

Lennier Shirt - Fabric Cutting

Image
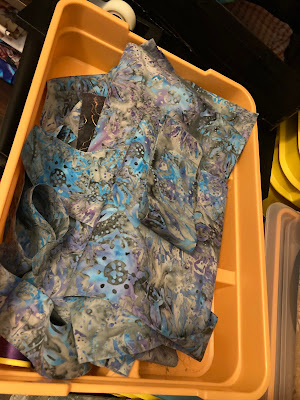
For a while, I've been planning a version of the tunic and robes worn by Lennier in the show Babylon 5. I'm less concerned with having an exact reproduction, what I want is to have a comfortable outfit which looks like Lennier's clothing, but where I could wear the individual pieces in other contexts and they would look fine. To help with that, I'm using a combination of images from the show and parts of two other patterns (Simplicity 1544 and McCall's 8423). So far, I've cut the fabric for the shirts (though I'll need to decide what fabric to use for the bias tape), and I've started sewing one of the shirts.    

Wide Pants - Complete

Image
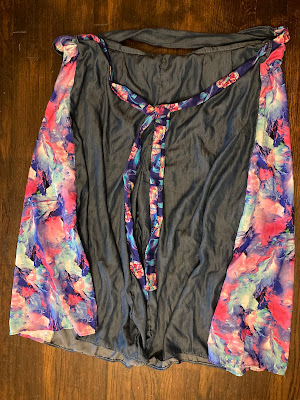
The (modified) pants are complete! I started out using Simplicity pattern S1069 but then changed more and more once I realized the pants would be too tight for me if I didn't alter something. The original pattern didn't have the side panels, and the belt would have been all one fabric. But I used a complementary but distinct fabric for the belt, and I added colorful side panels in between what would have been the side seams on the legs. This also meant I needed to cut my own waistband panels. By the time I started modifying I'd already installed the zipper, so the waistband elastic is a bit wonky. If I did this over again, intending to modify it, I would have closed the back without a zipper and changed the waistband structure a bit so that it was more elastic-friendly. Overall, I'm very happy with this as a garment for me!